Installation pour développeur d’OctoBot
La traduction française de cette page est en cours.
This environment allows you to fully customize OctoBot and check out the latest unstable branches
- Install OctoBot requirements
- Cloning OctoBot repositories
- Setting up PyCharm IDE
- Setting up Visual Studio Code IDE
Installer les prérequis d’OctoBot
Download and install:
- IDE: PyCharm or Visual Studio Code
- SCM: Git
- We also use GitKraken to easily manage OctoBot’s multiple repos, this is just a quality of life improvement and is not necessary.
- Programming language: Python 3.10
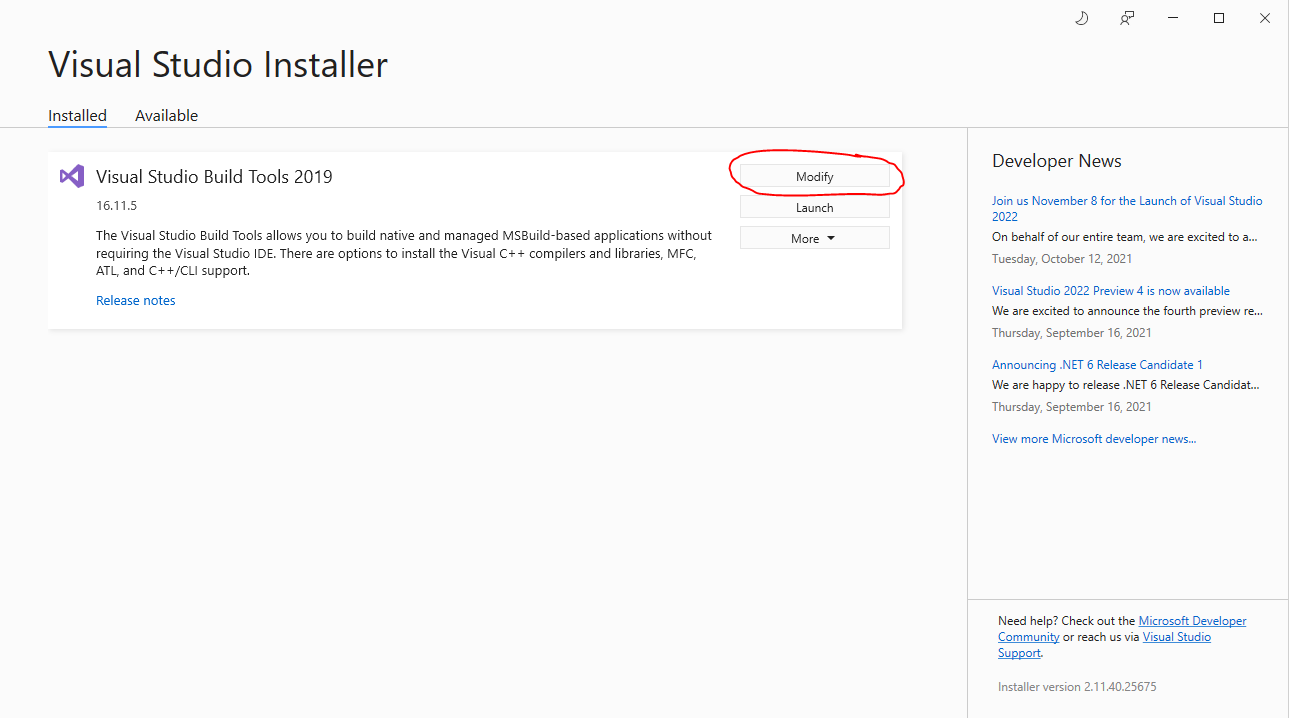
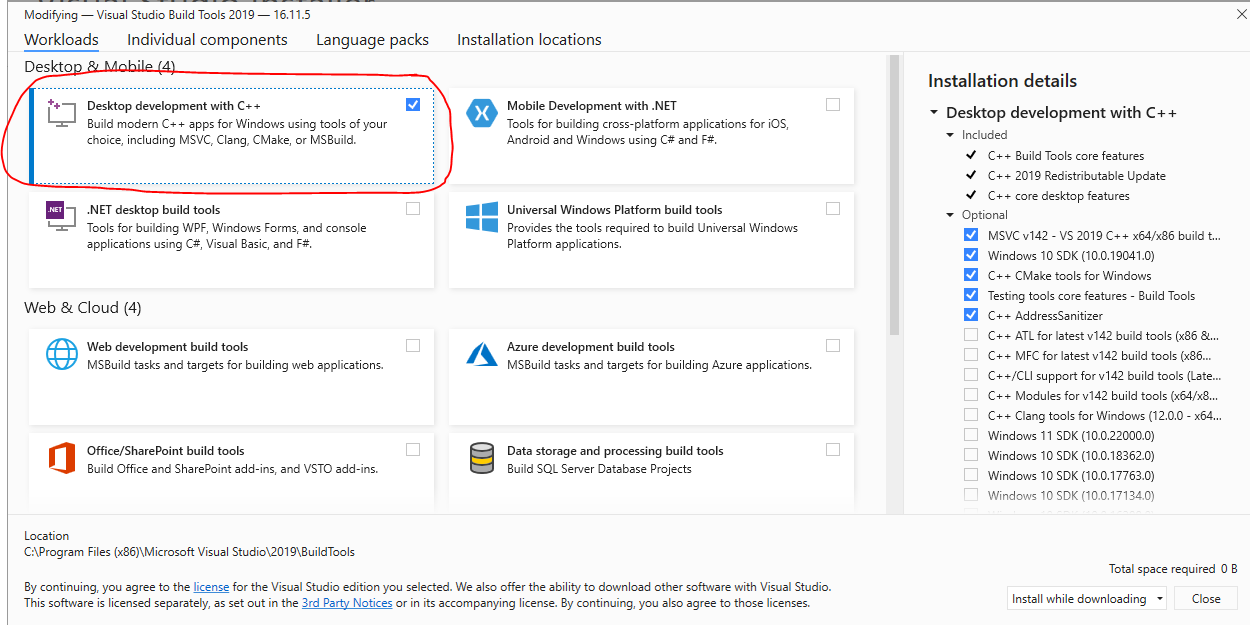
Prérequis additionnels pour Windows
- Download Visual Studio Build Tools and install “Desktop development with C++“. It can be from 2019 or later.
Prérequis additionnels pour Mac
- install GCC
Dépôts OctoBot
Clonner les dépôts OctoBot avec git
- open a terminal in your project folder and execute the following commands to download the repos
git clone https://github.com/Drakkar-Software/OctoBot.git --branch dev
git clone https://github.com/Drakkar-Software/OctoBot-Tentacles.git --branch dev
git clone https://github.com/Drakkar-Software/OctoBot-Trading.git
git clone https://github.com/Drakkar-Software/OctoBot-Evaluators.git
git clone https://github.com/Drakkar-Software/OctoBot-Services.git
git clone https://github.com/Drakkar-Software/OctoBot-Backtesting.git
git clone https://github.com/Drakkar-Software/OctoBot-Tentacles-Manager.git
git clone https://github.com/Drakkar-Software/OctoBot-Commons.git
git clone https://github.com/Drakkar-Software/Async-Channel.git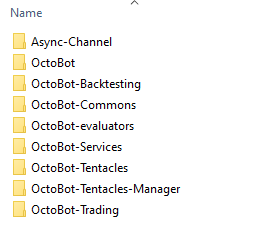
git clone https://github.com/Drakkar-Software/trading-backend.git- now you should have all the OctoBot repos in one folder
Manager les dépôts avec GitKraken
- open each folder in GitKraken
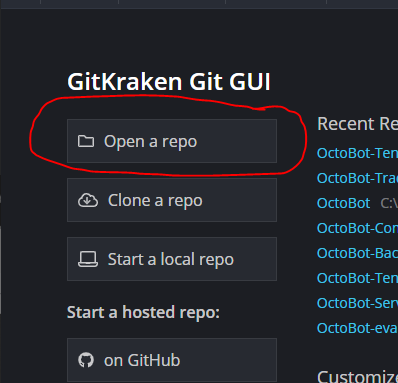
- add your project directory (the folder where all repo folders are located)
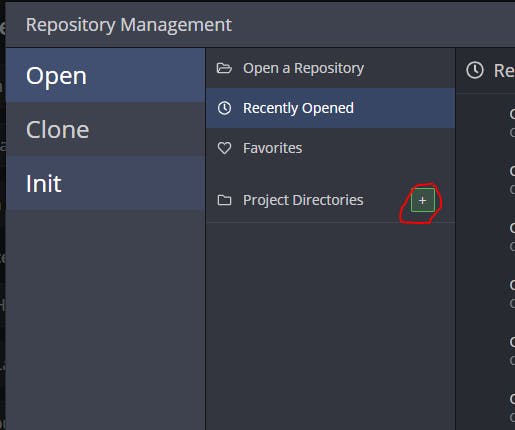
- now add each folder
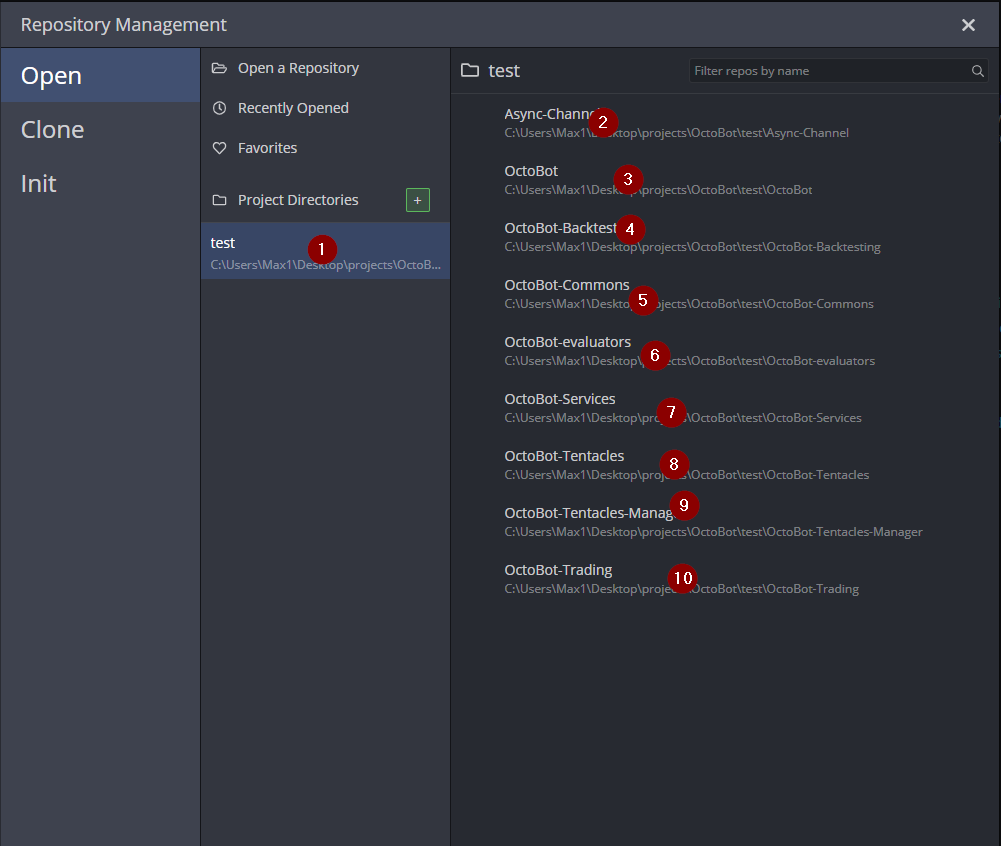
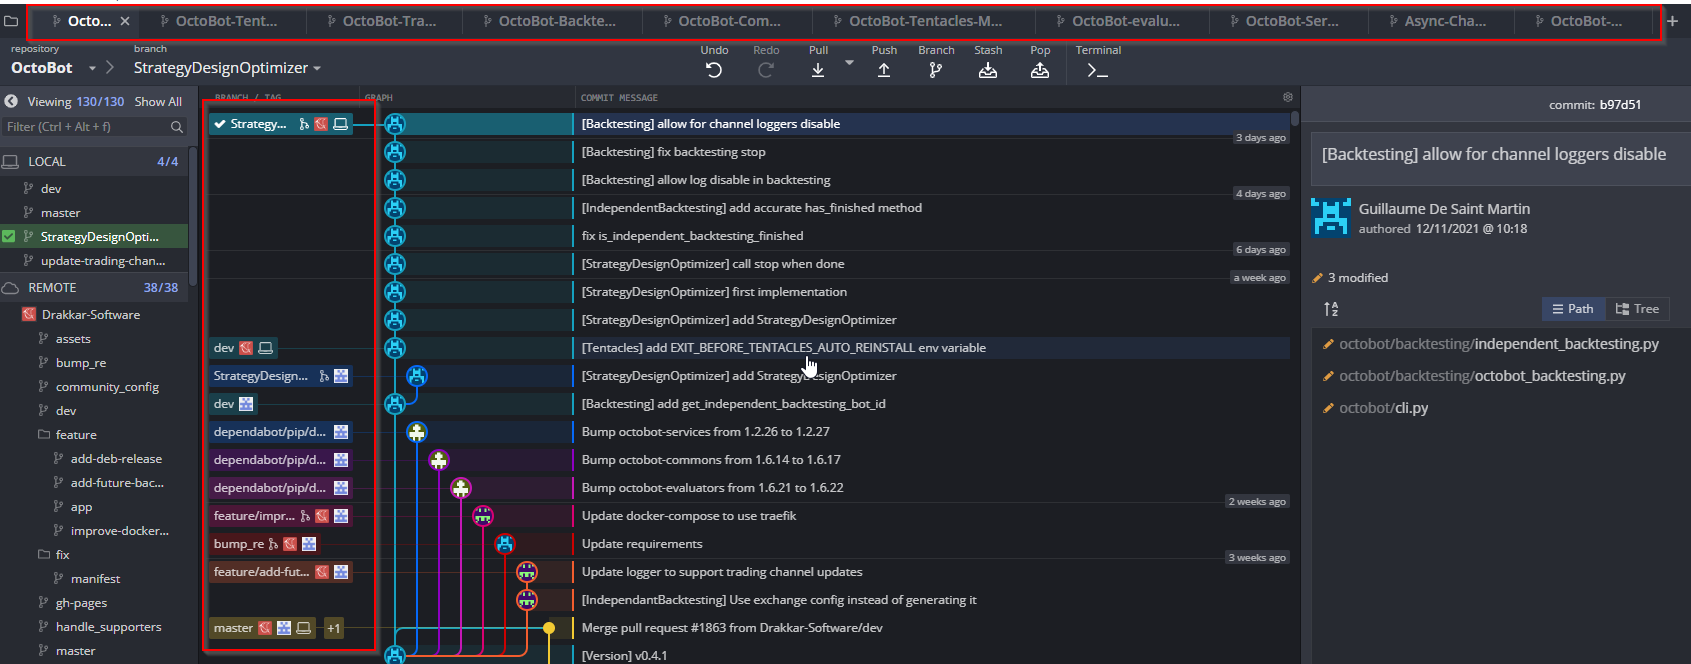
- Now you have all repositories open as tabs and you can switch between git repositories and branches
Sélectionner les branches expériementales
- You can explore and switch to different branches by double-clicking on the branch name for each repository, or right click “reset to this commit”.
Configurer l’IDE PyCharm
We recommend using PyCharm to navigate through the OctoBot projects. This IDE will allow you to open and navigate through the multiple OctoBot repositories and make your OctoBot run setup use the code directly from the cloned repos using the project dependencies.
- Open Pycharm and open the folder where all the OctoBot repositories are.
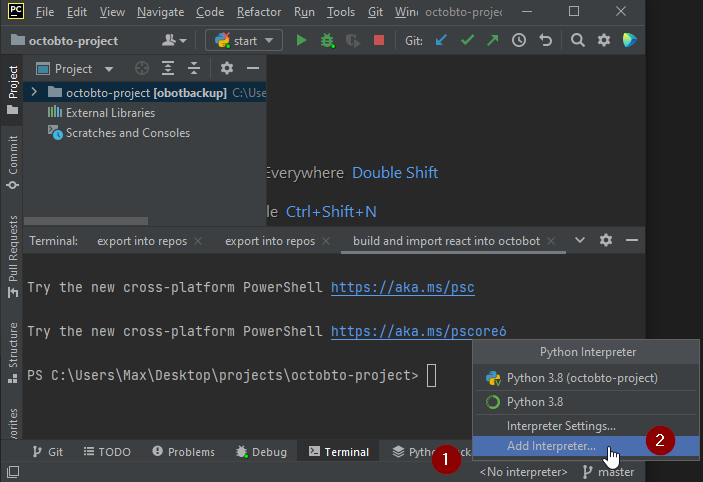
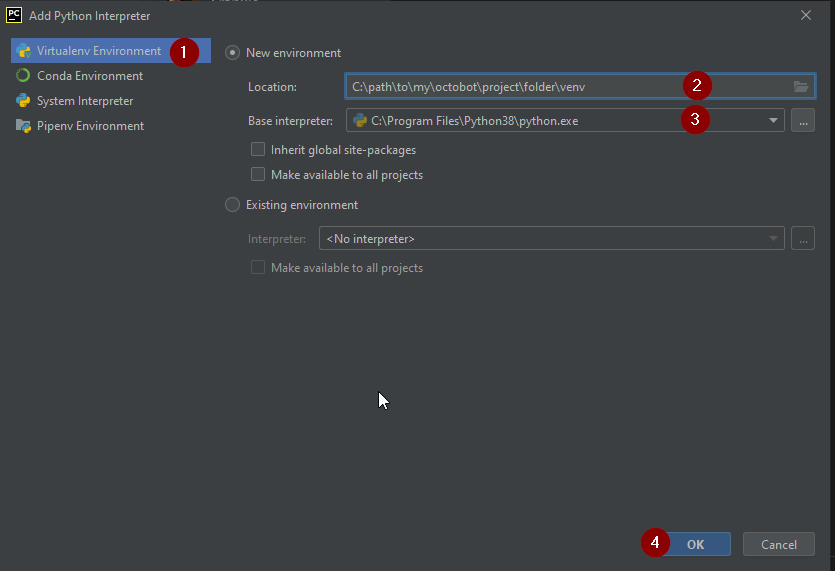
Ajouter l’interpréteur Python
- click on “<No interpreter>“
- then click on “Add Interpreter…“
- select “Virtualenv Environment”
- select the location of your venv. This should be your OctoBot project folder with “/venv” at the end
- select your base interpreter and make sure its python 3.10 or 310
Installer les prérequis d’Octobot
- For each OctoBot’s repository: install missing dependencies in requirements.txt and dev_requirements.txt
- To install these requirements on your PyCharm virtual environment, you can either:
- Manually go through each file listed in the commands below and install its requirements using the PyCharm requirements plugin
- In a new terminal, activate your the virtual environment create by PyCharm (venv directory) and then run the following commands
pip install -r OctoBot/requirements.txt
pip install -r OctoBot-Backtesting/requirements.txt
pip install -r OctoBot-Commons/requirements.txt
pip install -r OctoBot-Evaluators/requirements.txt
pip install -r OctoBot-Services/requirements.txt
pip install -r OctoBot-Tentacles-Manager/requirements.txt
pip install -r OctoBot-Trading/requirements.txt
pip install -r Async-Channel/requirements.txt
pip install -r trading-backend/requirements.txt

pip install -r OctoBot-Backtesting/dev_requirements.txt
pip install -r OctoBot-Commons/dev_requirements.txt
pip install -r OctoBot-Evaluators/dev_requirements.txt
pip install -r OctoBot-Services/dev_requirements.txt
pip install -r OctoBot-Tentacles-Manager/dev_requirements.txt
pip install -r OctoBot-Trading/dev_requirements.txt
pip install -r OctoBot-Trading/dev_requirements.txt
pip install -r trading-backend/dev_requirements.txt
Warning: Through the requirements you have also installed OctoBot packages related to the previously downloaded repositories. You must uninstall them or your python runner will use them instead of your local code version.
- remove OctoBot pip packages to use the packages from your project directory
pip uninstall -y OctoBot-Backtesting OctoBot-Trading Async-Channel OctoBot-Evaluators OctoBot-Commons OctoBot-Tentacles-Manager OctoBot-Services trading-backend
Ajouter les modules d’OctoBot
This will allow your PyCharm python runner to use your OctoBot repositories as source code directly. Thanks to this you will be able to edit any file in any repo and it will be taken into account in your other PyCharm run profiles runners from other open OctoBot repo. This is useful when running tests. If you skip this, you will need to install every OctoBot module with pip and won’t be able to edit their code.
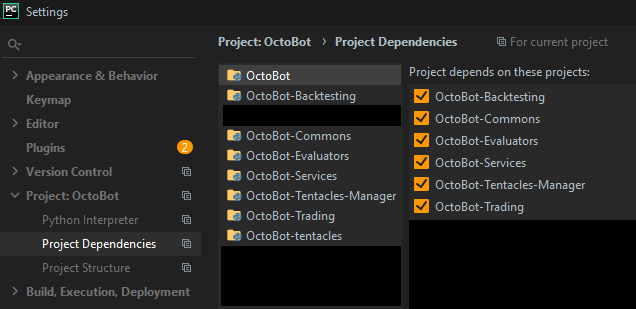
Ajouter les modules d’OctoBot avec PyCharm Pro
-
In File/Settings/Project/Python Dependencies: For each repository: check its required OctoBot repository dependency.
Ajouter les modules d’OctoBot avec PyCharm Community
Go to File -> Settings and add your OctoBot module folders as a project source
Créer les scripts de lancement avec PyCharm
Create PyCharm run configurations using the previously created virtual env (with all the dependencies installed) for each way you want to start python commands (running OctoBot, running tests, etc).
Scripts d’installation d’OctoBot
Here we explain how to setup and run two scripts for OctoBot, but there are way more you can set up by yourself, explore the rest of the docs to find out more commands
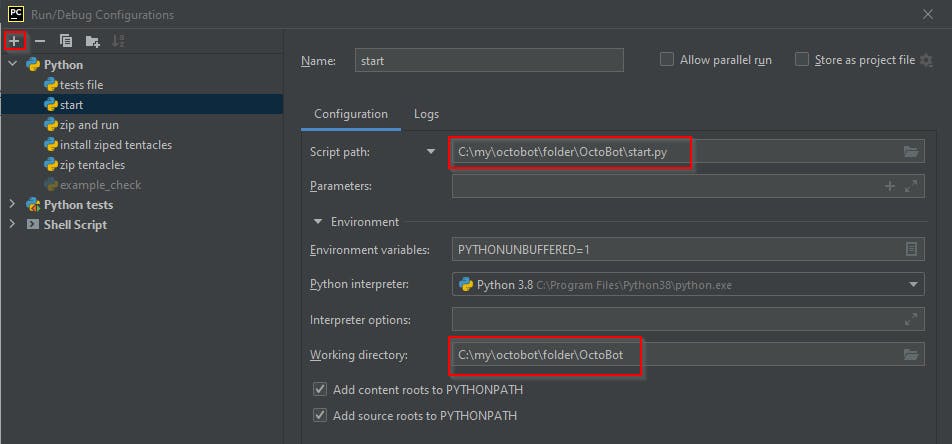
Script de lancement d’OctoBot
This script will run OctoBot and apply all changes made to all repositories except the OctoBot-Tentacles folder (see install OctoBot-Tentacles and run OctoBot script)
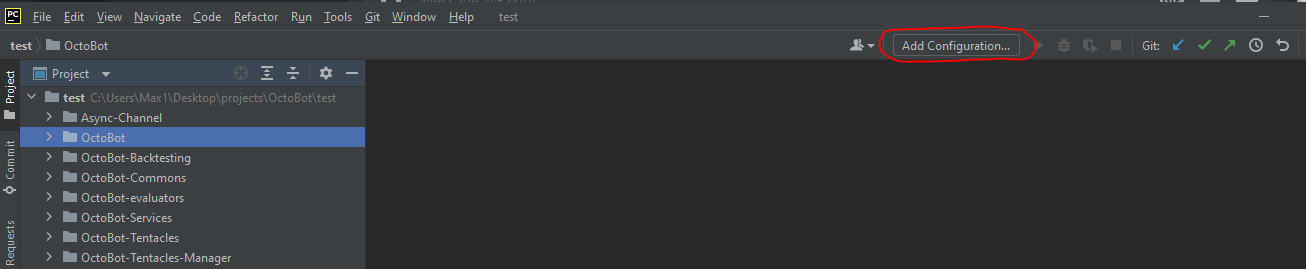
- click on Add Configuration

now add a new python script
Lancer OctoBot dans PyCharm
- You can now run and debug the whole OctoBot project and its repositories by clicking on the play button, or on the debugging button to run the debugger

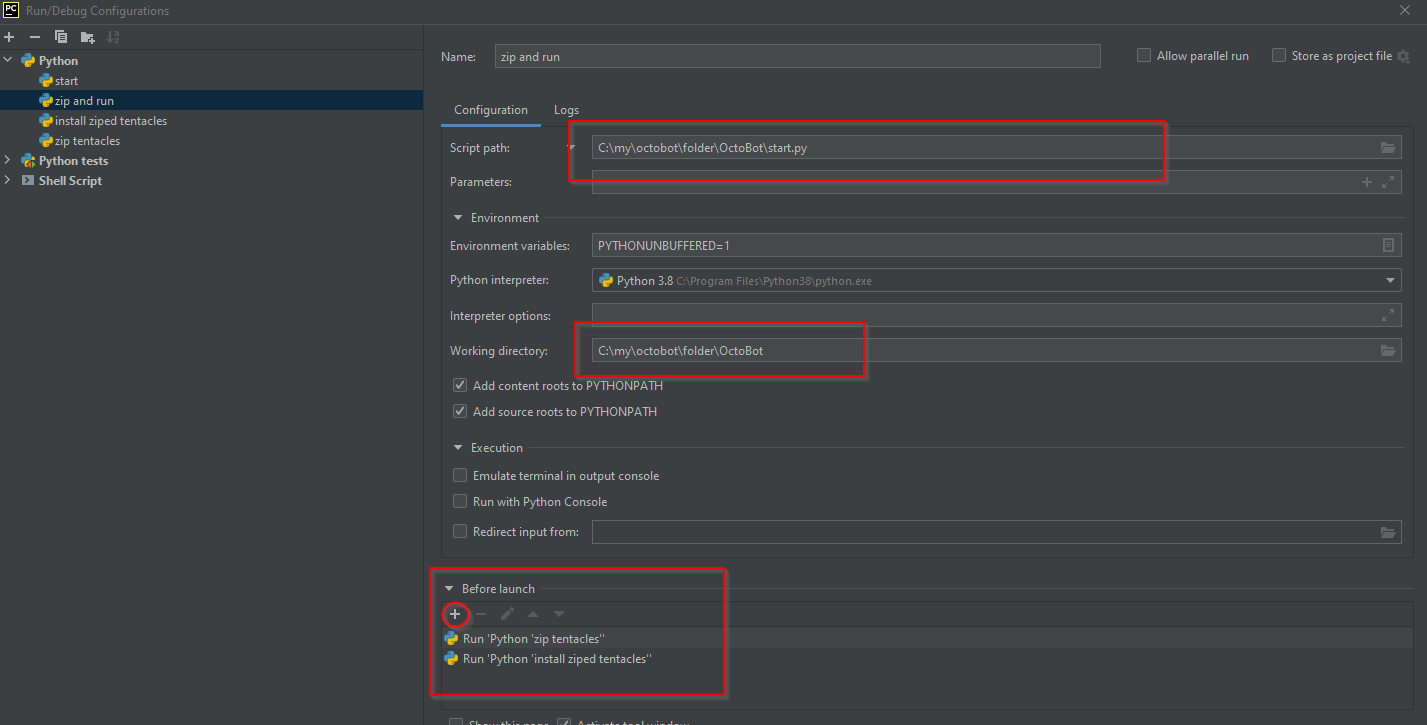
Scripts pour installer OctoBot-Tentacles et lancer OctoBot in PyCharm
This script will install the OctoBot-Tentacles folder and run Octobot with all your changes applied from all repositories.
Créer les 3 scripts suivants:
- Script to create an installable OctoBot-Tentacles package
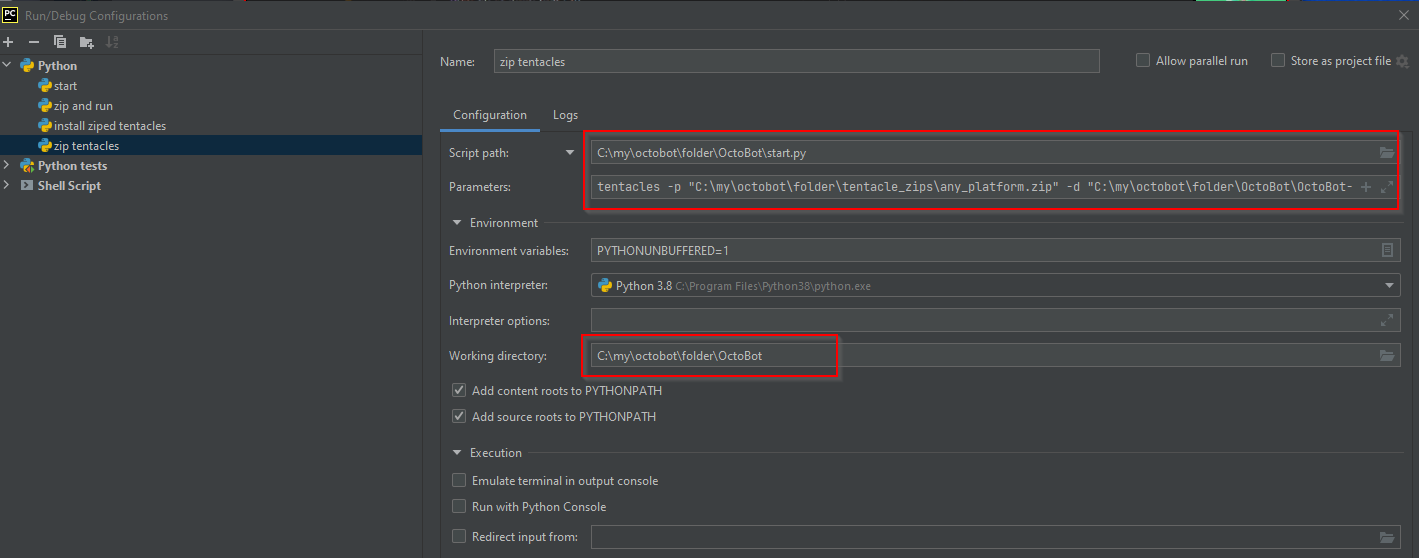
- Script to install OctoBot-Tentacles package
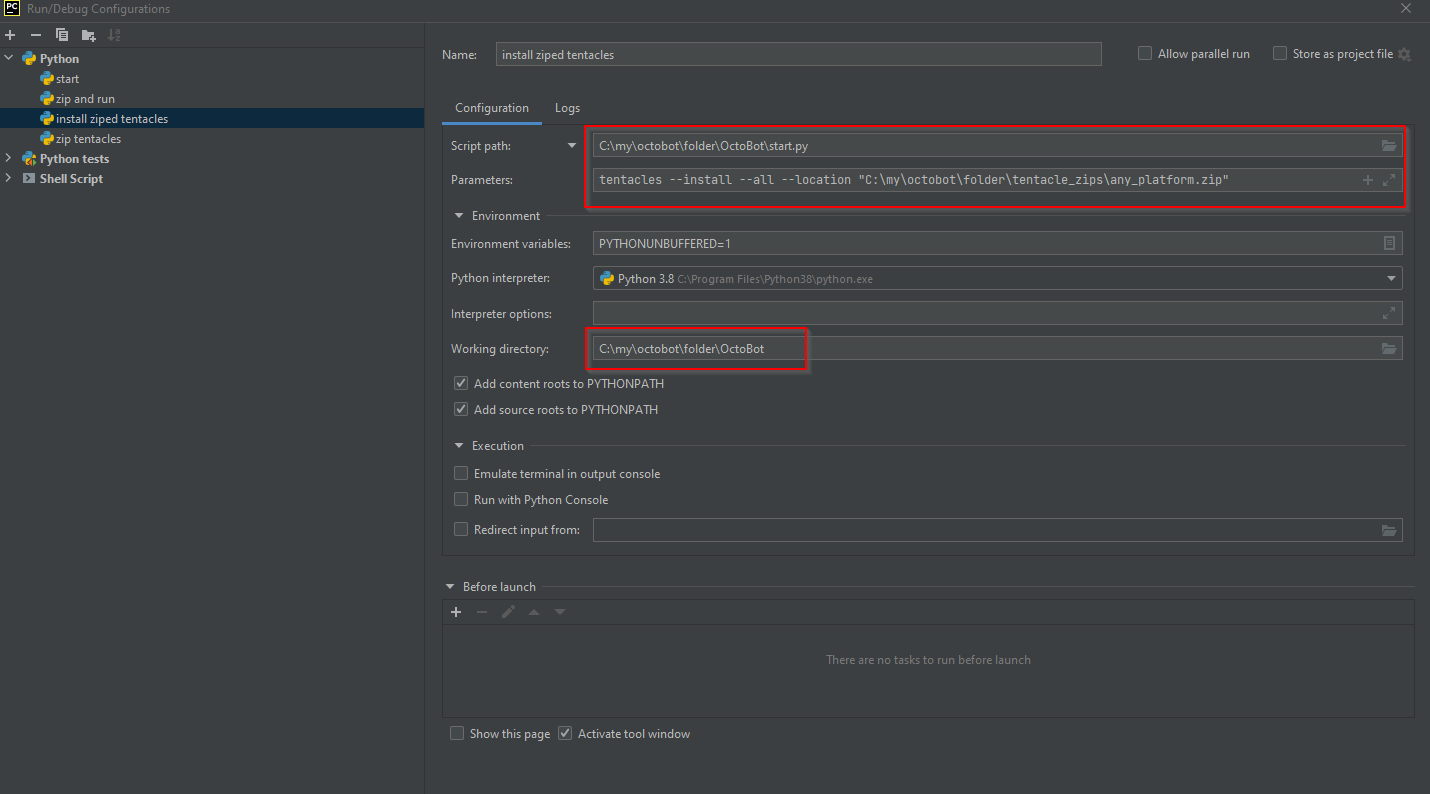
- Script to zip, install and run in one go
Configurer l’IDE Visual Studio Code
Ouvrir le dossier projet dans VS Code
Open the OctoBot Project root folder with VS Code
Créer un Environnement Virtuel
depending your system instead of “python” you might need to use “python3.10” or “python310” . Especially if you have multiple versions of python installed it’s important to use the right version
python -m venv venv Activer l’environnement virtuel
on Windows:
.\venv\Scripts\activateon Debian/Ubuntu:
source venv/bin/activateCréer le fichier VSCode launch.json
The VS Code launch config is located in project-folder/.vscode/launch.json
{
    "version": "0.2.0",
    "configurations": [

        {
            "name": "Start OctoBot",
            "type": "python",
            "request": "launch",
            "env": {
                "PYTHONPATH": "${workspaceFolder}/Async-Channel:${workspaceFolder}/OctoBot-Tentacles-Manager:${workspaceFolder}/OctoBot-Commons:${workspaceFolder}/OctoBot-Trading:${workspaceFolder}/OctoBot-Backtesting:${workspaceFolder}/OctoBot-Evaluators:${workspaceFolder}/OctoBot-Services"
            },
            "program": "start.py",
            "console": "integratedTerminal",
            "cwd": "${workspaceFolder}/OctoBot",
            "args": [''],
            "justMyCode": true
        }
    ]
}
Créer le fichier VSCode settings.json
The VS Code settings.json is located in project-folder/.vscode/settings.json
{
    "python.analysis.extraPaths": [
        "./OctoBot",
        "./Async-Channel",
        "./OctoBot-Backtesting",
        "./OctoBot-Commons",
        "./OctoBot-Services",
        "./OctoBot-Evaluators",
        "./OctoBot-Trading",
        "./OctoBot-Tentacles-Manager",
    ]
}
Installer les prérequis d’Octobot
- For each OctoBot’s repository: install missing dependencies in requirements.txt and dev_requirements.txt
pip install -r OctoBot/requirements.txt
pip install -r OctoBot-Backtesting/requirements.txt
pip install -r OctoBot-Commons/requirements.txt
pip install -r OctoBot-Evaluators/requirements.txt
pip install -r OctoBot-Services/requirements.txt
pip install -r OctoBot-Tentacles-Manager/requirements.txt
pip install -r OctoBot-Trading/requirements.txt
pip install -r Async-Channel/requirements.txt
pip install -r OctoBot-Backtesting/dev_requirements.txt
pip install -r OctoBot-Commons/dev_requirements.txt
pip install -r OctoBot-Evaluators/dev_requirements.txt
pip install -r OctoBot-Services/dev_requirements.txt
pip install -r OctoBot-Tentacles-Manager/dev_requirements.txt
pip install -r OctoBot-Trading/dev_requirements.txt
pip install -r OctoBot/dev_requirements.txt
Warning: Through the requirements you have also installed OctoBot packages related to the previously downloaded repositories. You must uninstall them or your python runner will use them instead of your local code version.
- remove OctoBot pip packages to use the packages from your project directory
pip uninstall -y OctoBot-Backtesting OctoBot-Trading Async-Channel OctoBot-Evaluators OctoBot-Commons OctoBot-Tentacles-Manager OctoBot-Services
Lancer OctoBot avec Visual Studio Code
Press F5 on your keybord to start OctoBot